.png)
Church branding (sender signatures and domain)
Flows send branded, domain-authenticated email from your church, not from a generic GivFlow address. In this product, branding is not a logo file uploader. There is no separate logo page under Settings.
Branding is:
- A verified sending domain (DKIM and Return-Path), so inboxes trust the message.
- A sender signature — the display name donors see next to the from address.
That is how a recovery, welcome, or lapse email looks like the rest of your church communication, especially next to Planning Center’s unbranded no-reply@planningcenteronline.com failure notice.
Settings → Email is titled Email Configuration. Intro copy:
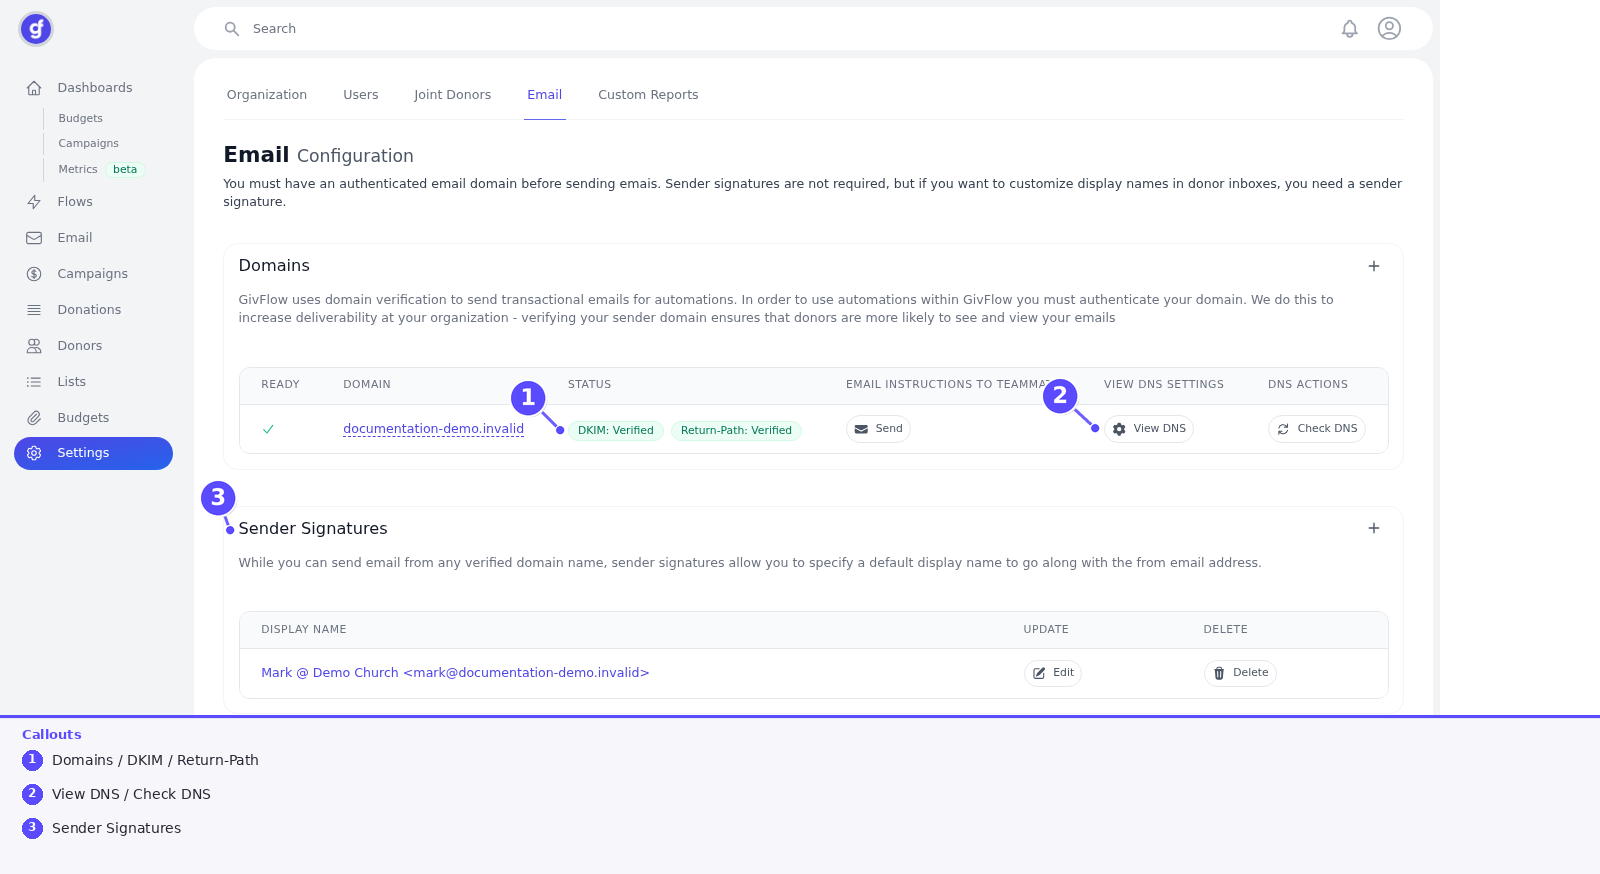
You must have an authenticated email domain before sending emails. Sender signatures are not required, but if you want to customize display names in donor inboxes, you need a sender signature.
How to
Verify the domain (required to send)
- In the left sidebar, open Settings.
- Click the Email tab.
- Under Domains, click + to add the church domain (the part after
@on staff email). - Use View DNS for the records to paste at your registrar, Send to email those instructions to a teammate, and Check DNS after they are in place.
- A ready domain shows a check in Ready, plus badges DKIM: Verified and Return-Path: Verified.
Full DNS steps: Connect your domain.
Add a sender signature (display name)
- Stay on Settings → Email.
- Under Sender Signatures, click +.
- Set the display name that should appear with the from address (the table shows it as
Name @ Church <email@domain.com>). - Use Edit or Delete on an existing row.
Product copy on this table:
While you can send email from any verified domain name, sender signatures allow you to specify a default display name to go along with the from email address. Display names help personalize the email a little bit more!
There is no church-logo upload control on this page (or elsewhere in Settings). Do not look for one.
Confirm how mail looks in a flow
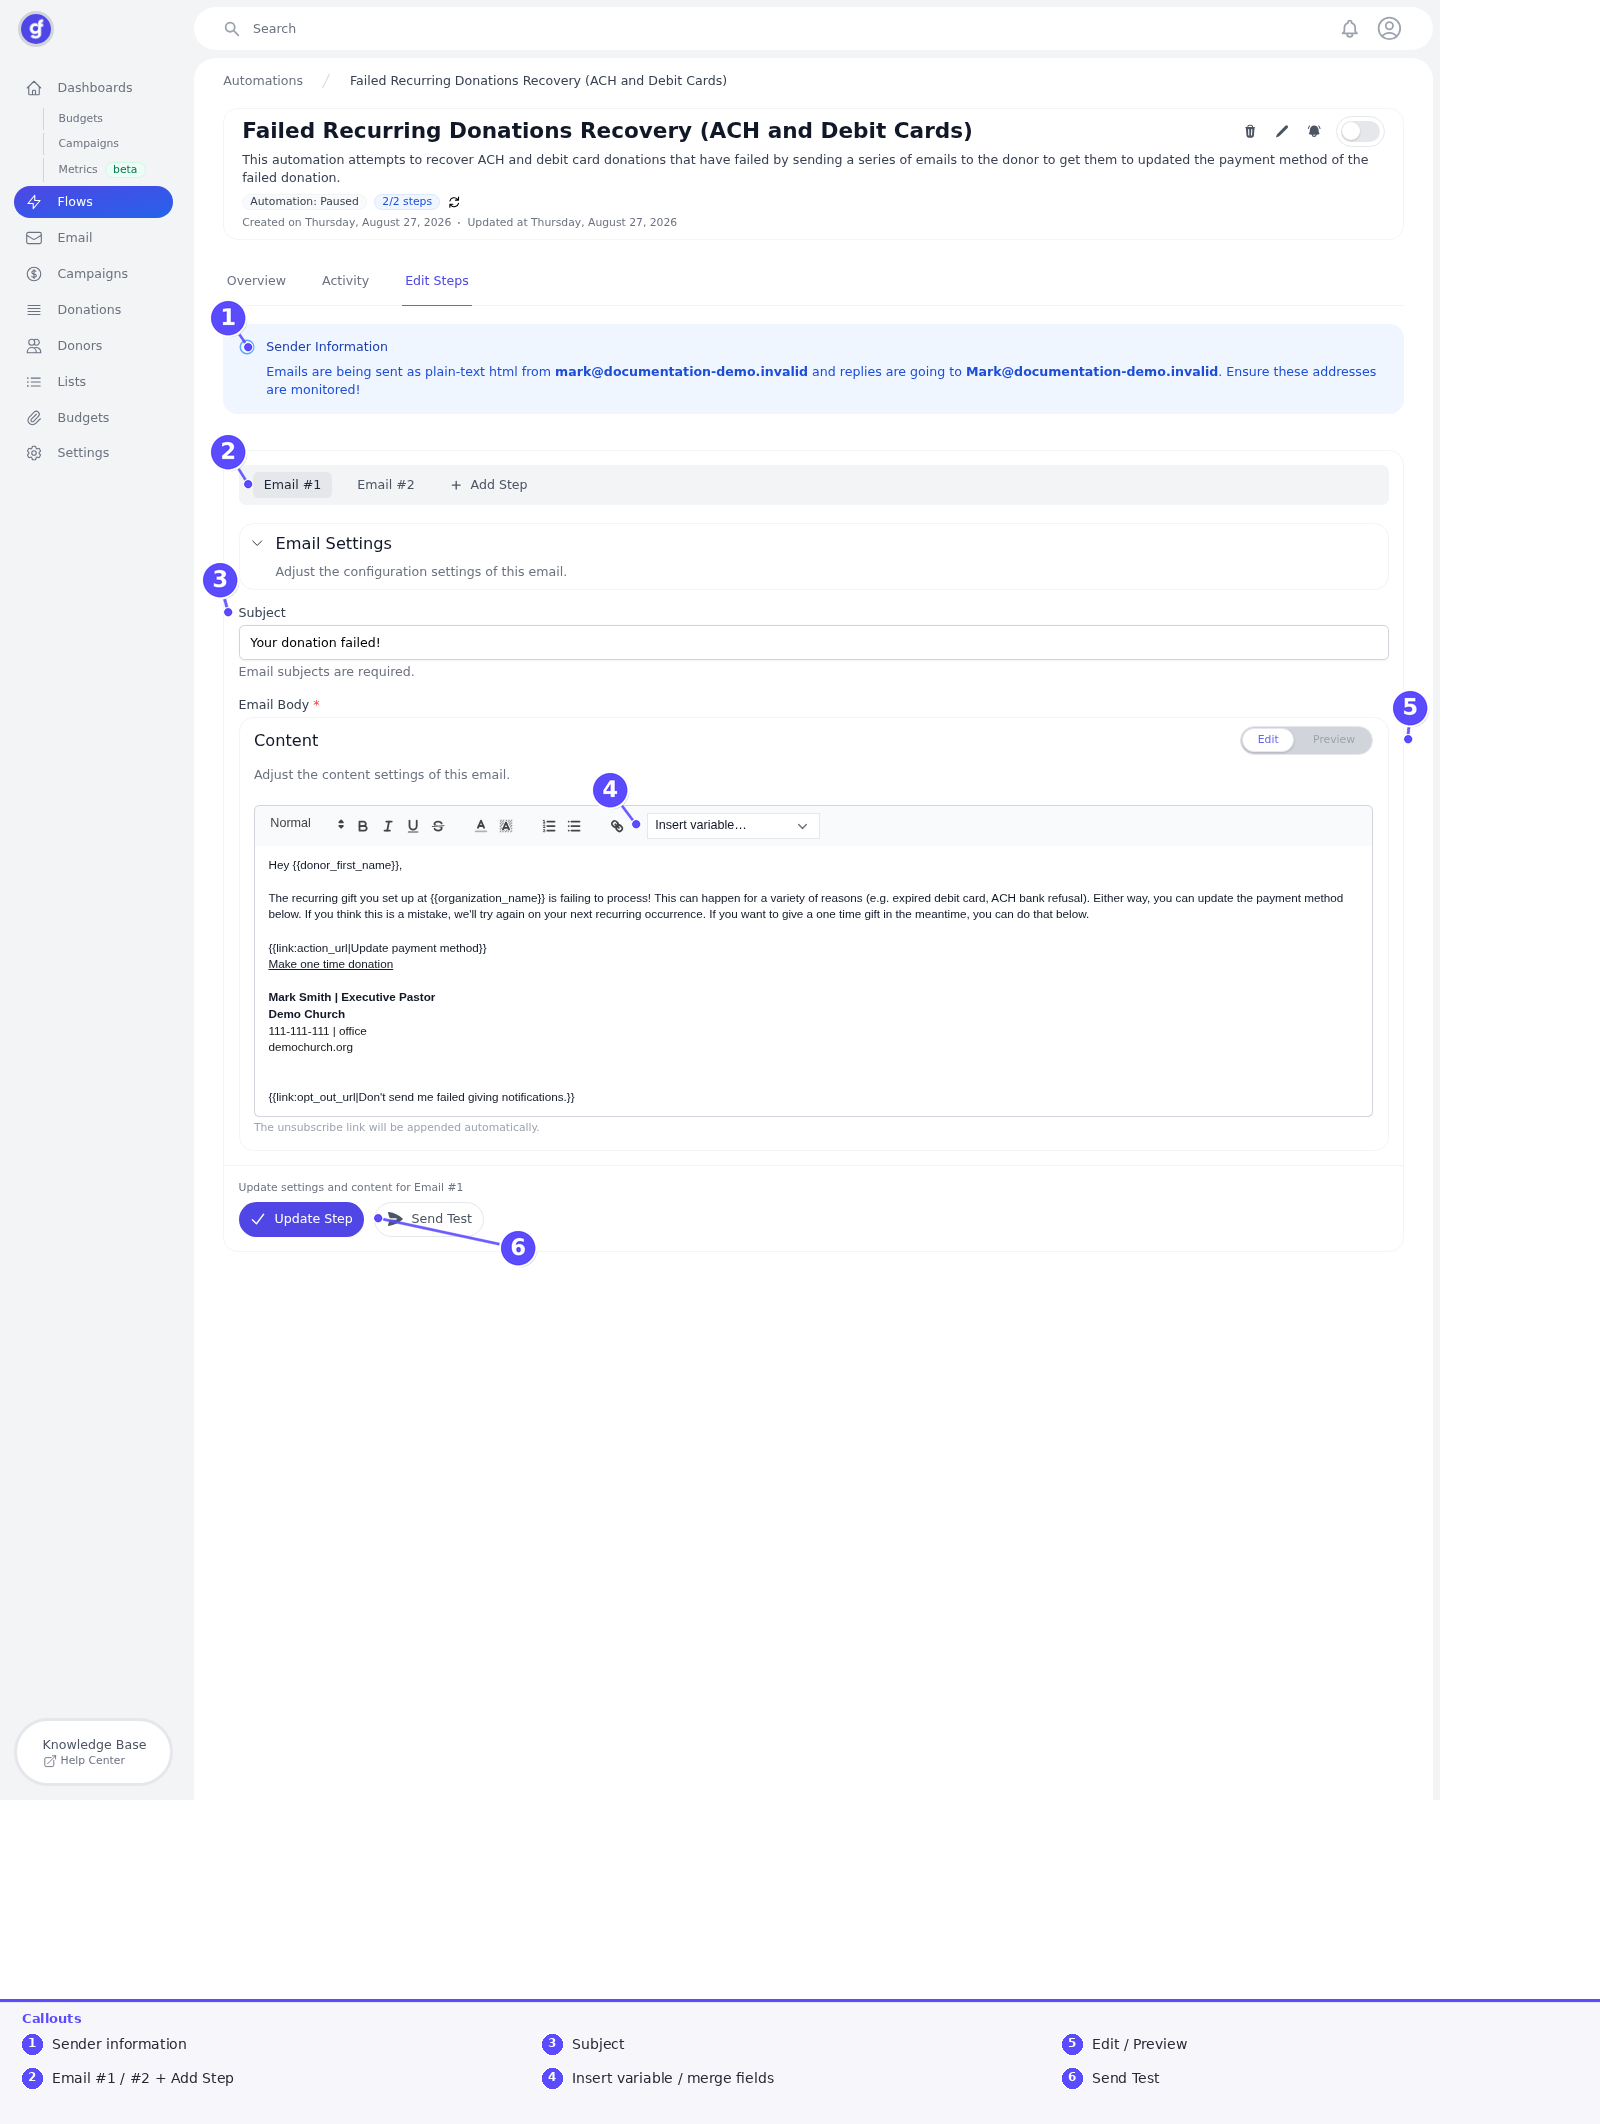
- Open Flows → the automation → Edit Steps.
- Read Sender Information (from and reply-to).
- Use Preview on a step. Send Test exists if you want a message in your own inbox — it is not required but recommended before enabling a flow.
A signature without a verified domain still cannot send as you. Connect the domain first.