.png)
Branding and sender signatures
Email branding in GivFlow is a verified sending domain plus optional sender signatures — the display name donors see next to the from address. GivFlow does not use a church logo file for this.
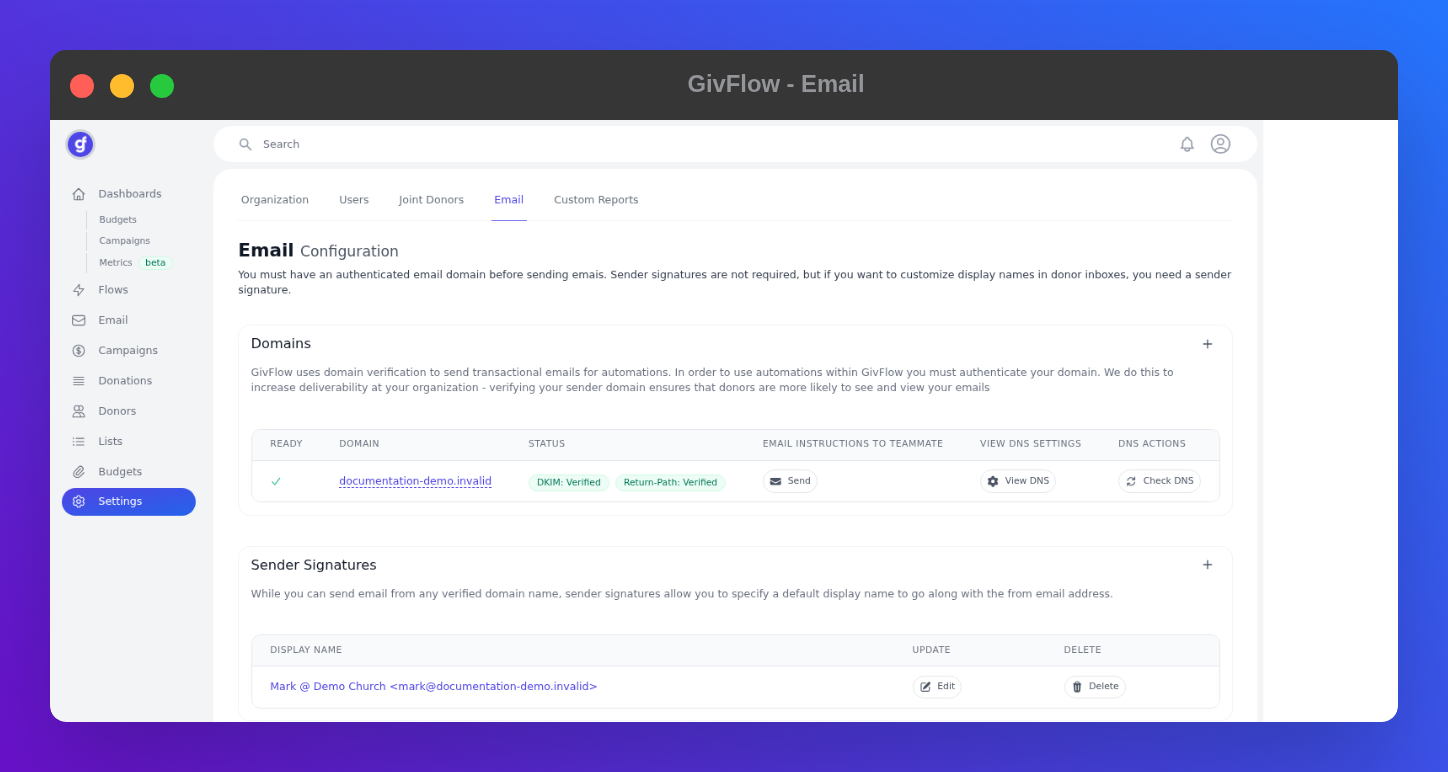
This lives under Settings → Email (Email Configuration). You must authenticate a domain before GivFlow can send as your church. Sender signatures are optional.
Before you send flow emails, verify DKIM and Return-Path on your domain. Unverified mail is more likely to be filtered or blocked.
Before you start
- You can open Settings in GivFlow.
- You know the church domain (the part after
@on staff email). - If someone else manages DNS, you will need their email so GivFlow can send them the records. They do not need a GivFlow login.
Verify your sending domain
- In the left sidebar, click Settings.
- Open the Email tab.
- Under Domains, click + and add your church domain.
- Click View DNS and add those records at your domain host. Copy type, host, and value from GivFlow — do not invent records.
- If you do not manage DNS, click Send on the domain row and enter the person who does.
- After the records are in place, click Check DNS.
A ready domain shows a check under Ready, plus DKIM: Verified and Return-Path: Verified.
DNS can take time to propagate. If a check fails, look for typos or extra quotes, then try Check DNS again.
Add a sender signature
A sender signature sets the display name next to the from address (for example Name @ Church <email@domain> ). You can send from any verified domain without one.
- Stay on Settings → Email.
- Under Sender Signatures, click +.
- Enter the display name donors should see.
- Use Edit or Delete on an existing row if you need to change it.
A signature without a verified domain still cannot send as your church. Verify the domain first.
The Email item in the sidebar is not a composer yet. Domain and signatures stay here. Flow emails use this setup once the domain is ready.